Add realistic fire VFX while preserving original footage
Adding fire to a shot is easy. Adding fire that feels naturally integrated into the scene, while preserving the actor, environment, and cinematography, is much harder.
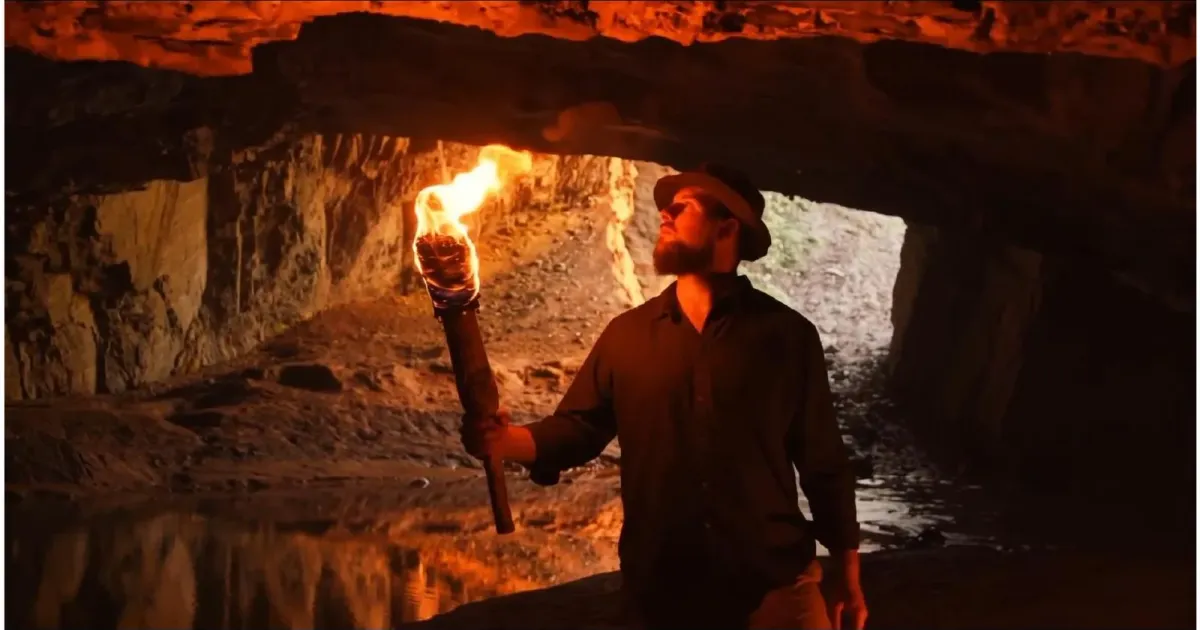
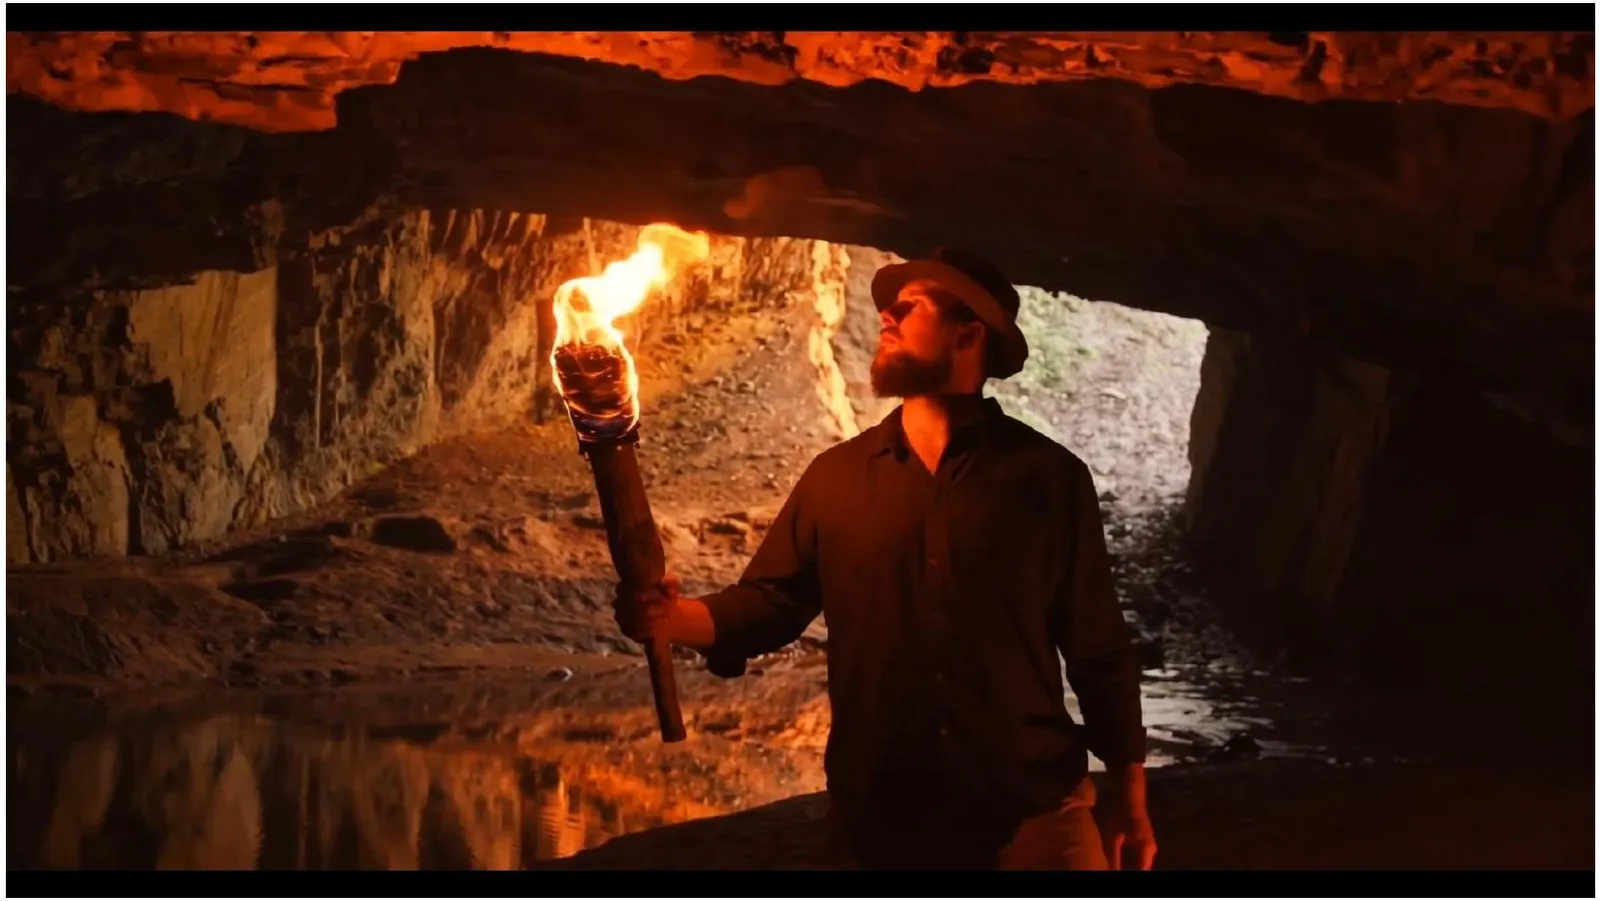
In a new Beeble Canvas tutorial, founder Hoon Kim demonstrates a complete workflow for turning an unlit torch into a convincing fire source while maintaining every important detail in the original footage. The fire illuminates the actor's face, influences the surrounding cave environment, and feels like it was captured on set.
The tutorial showcases how Canvas combines generative AI, masking, and SwitchX's relighting capabilities into a controllable visual effects workflow.
Watch the tutorial
The challenge: Fire changes everything
When fire is introduced into a scene, it doesn't simply occupy space. It becomes a light source.
That means the surrounding environment should react accordingly. Faces, clothing, walls, and shadows all need to respond to the new lighting conditions. Traditional workflows often require multiple compositing passes and significant manual work to achieve a believable result.
In this example, the source footage contains an actor holding an unlit torch inside a cave. The goal is to transform the torch into a blazing flame while preserving the actor, the cave, and the original cinematography.
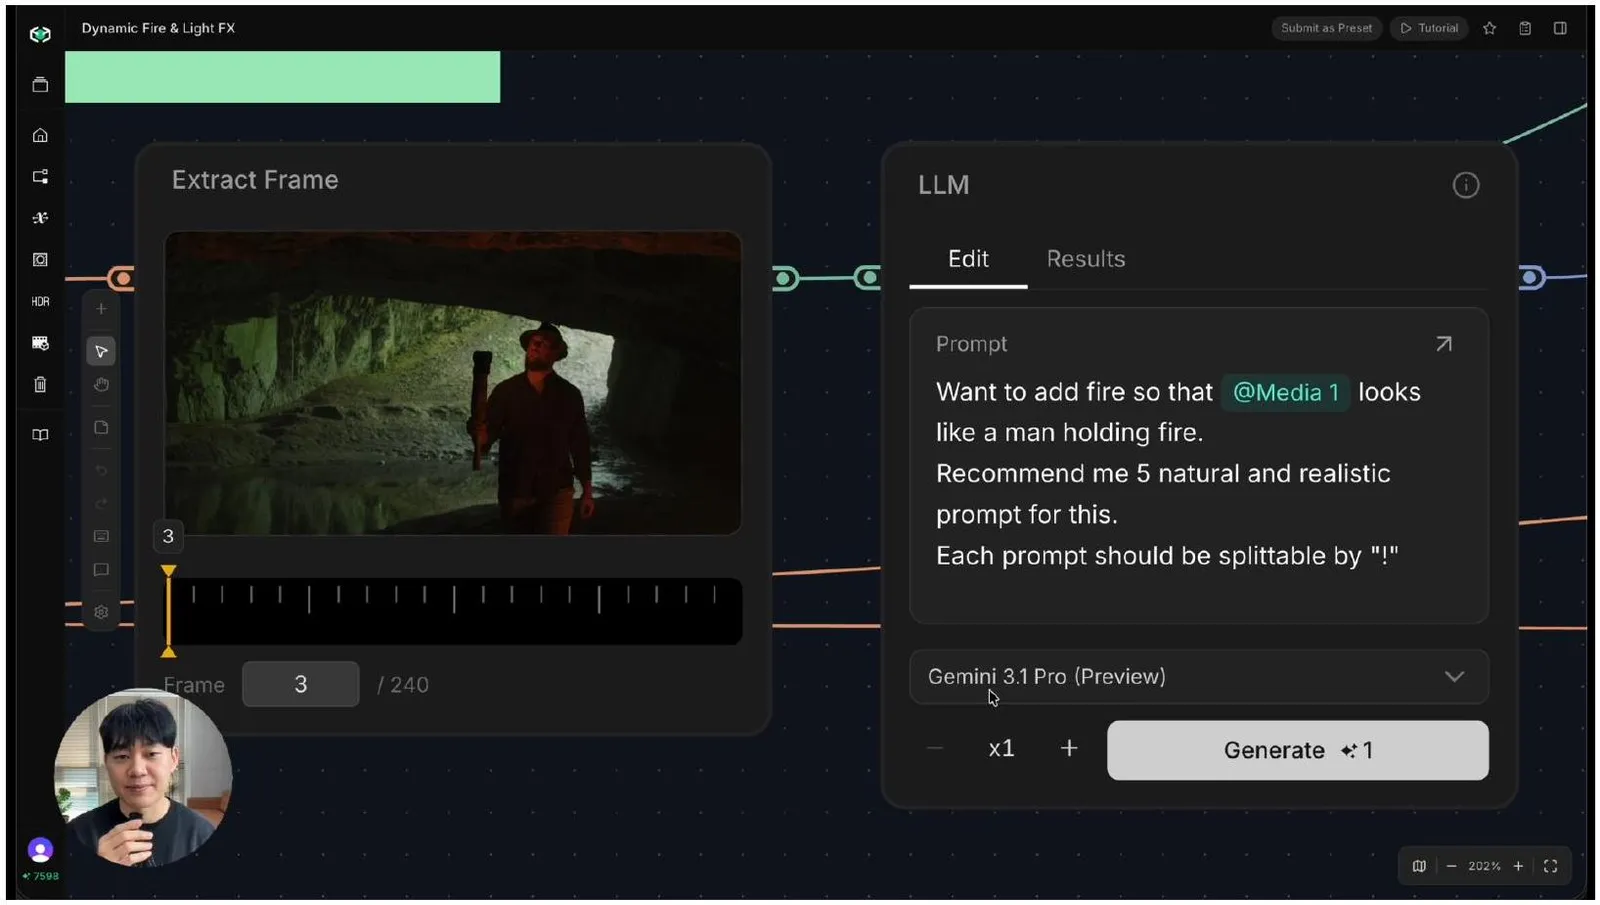
Step 1: Exploring concepts with AI
The workflow begins with a single frame extracted from the footage. Rather than manually writing prompts, the tutorial uses Gemini to generate multiple prompt variations describing realistic torch fire. The prompts are structured so they can be automatically separated and processed inside Canvas using a Text Iterator node.
This approach turns prompt creation into a rapid ideation process, allowing artists to explore several creative directions before committing to a final look.
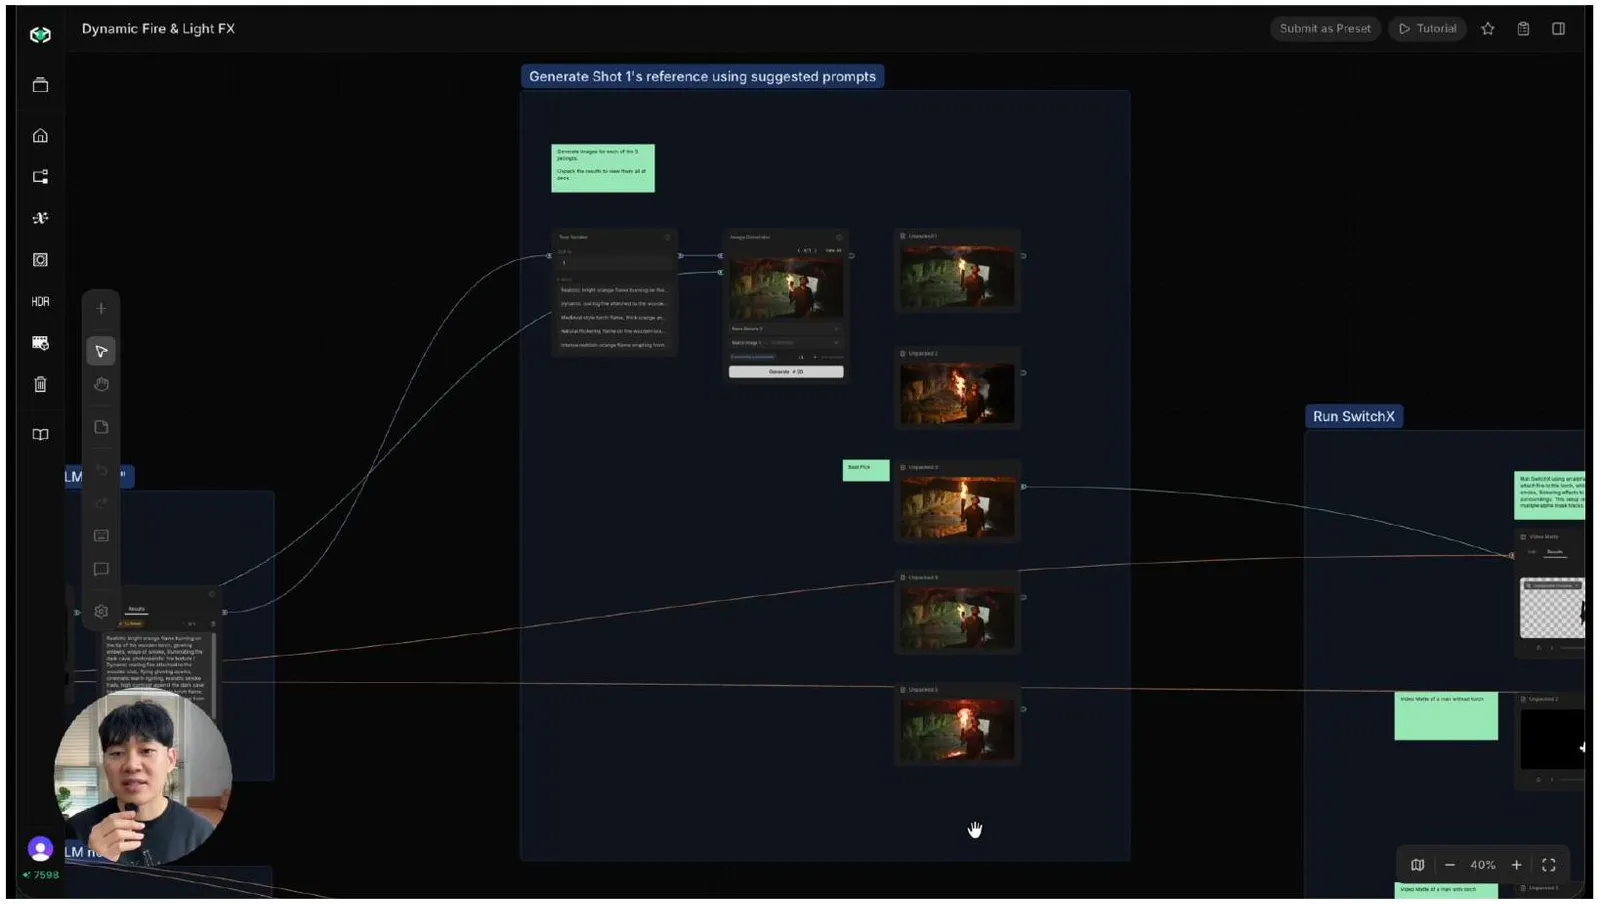
Step 2: Generating reference images
Those prompts are then passed into an Image Generator node using Nano Banana 2.
Canvas generates multiple reference images, each presenting a different interpretation of the desired fire effect. By viewing all options simultaneously, artists can quickly compare results and select the reference image that best matches their creative vision.
The workflow establishes a clear visual target that guides the next stage of the process.
Step 3: Building a targeted mask
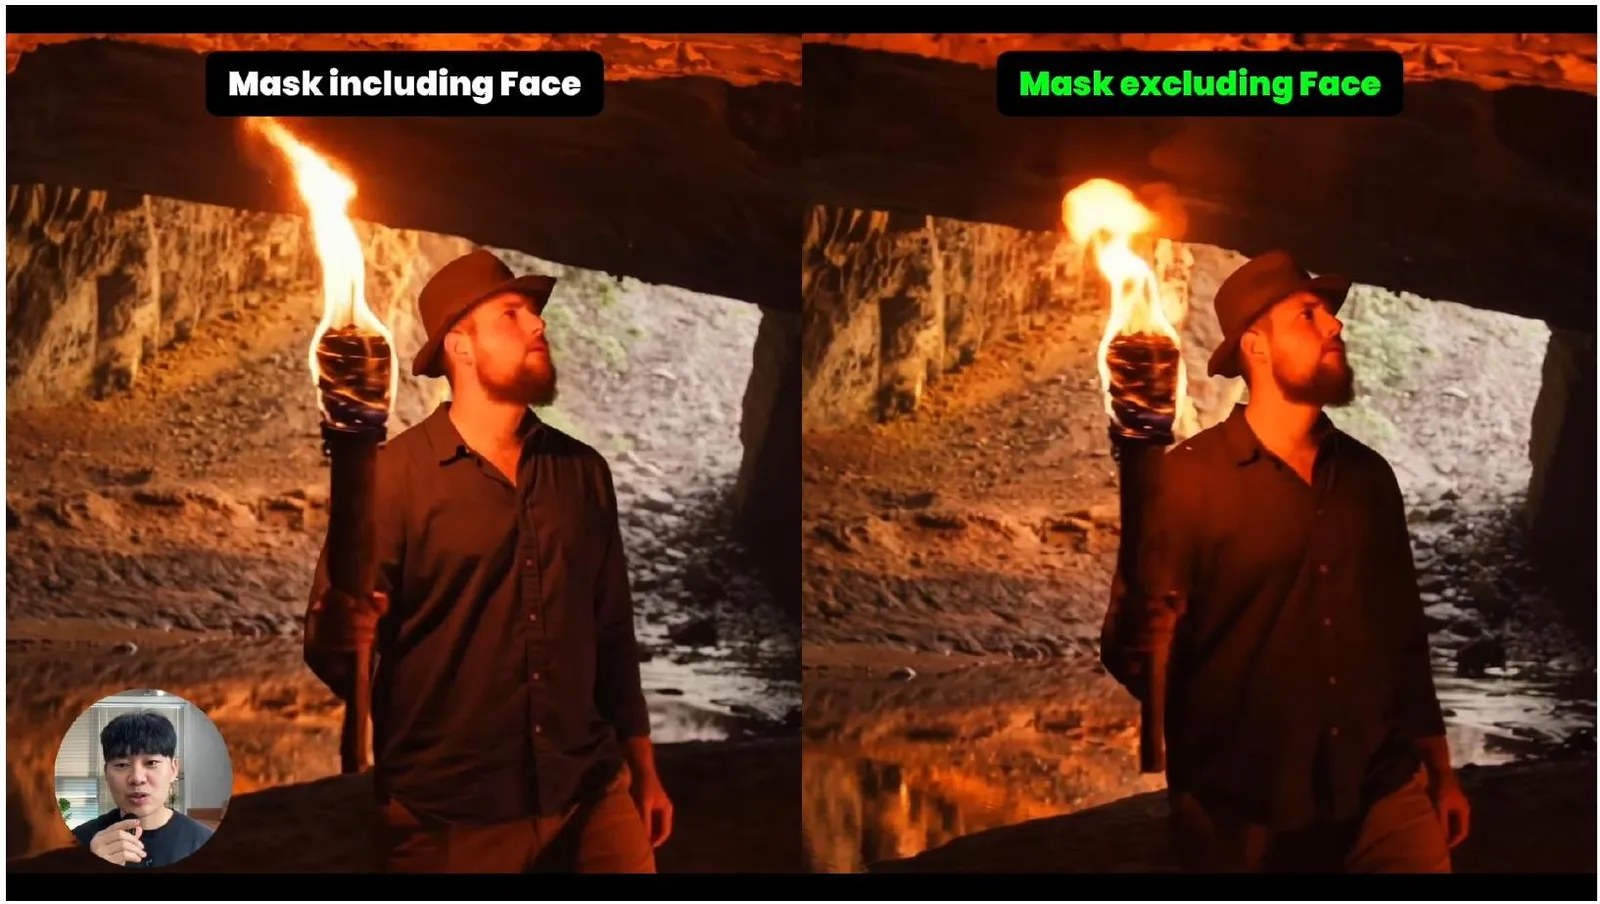
One of the most important parts of the workflow is masking. The mask tells SwitchX exactly which areas should remain untouched and where it is free to introduce new visual elements.
In this example, multiple masks are combined to protect the actor, clothing, and environment while leaving room for the fire to be generated naturally.
A particularly important detail occurs where the torch overlaps the actor's face. The face is excluded from the protected region, ensuring the generated fire can extend into the correct spatial area without creating unwanted artifacts.
The result is a highly controlled generation zone that preserves the integrity of the original shot.

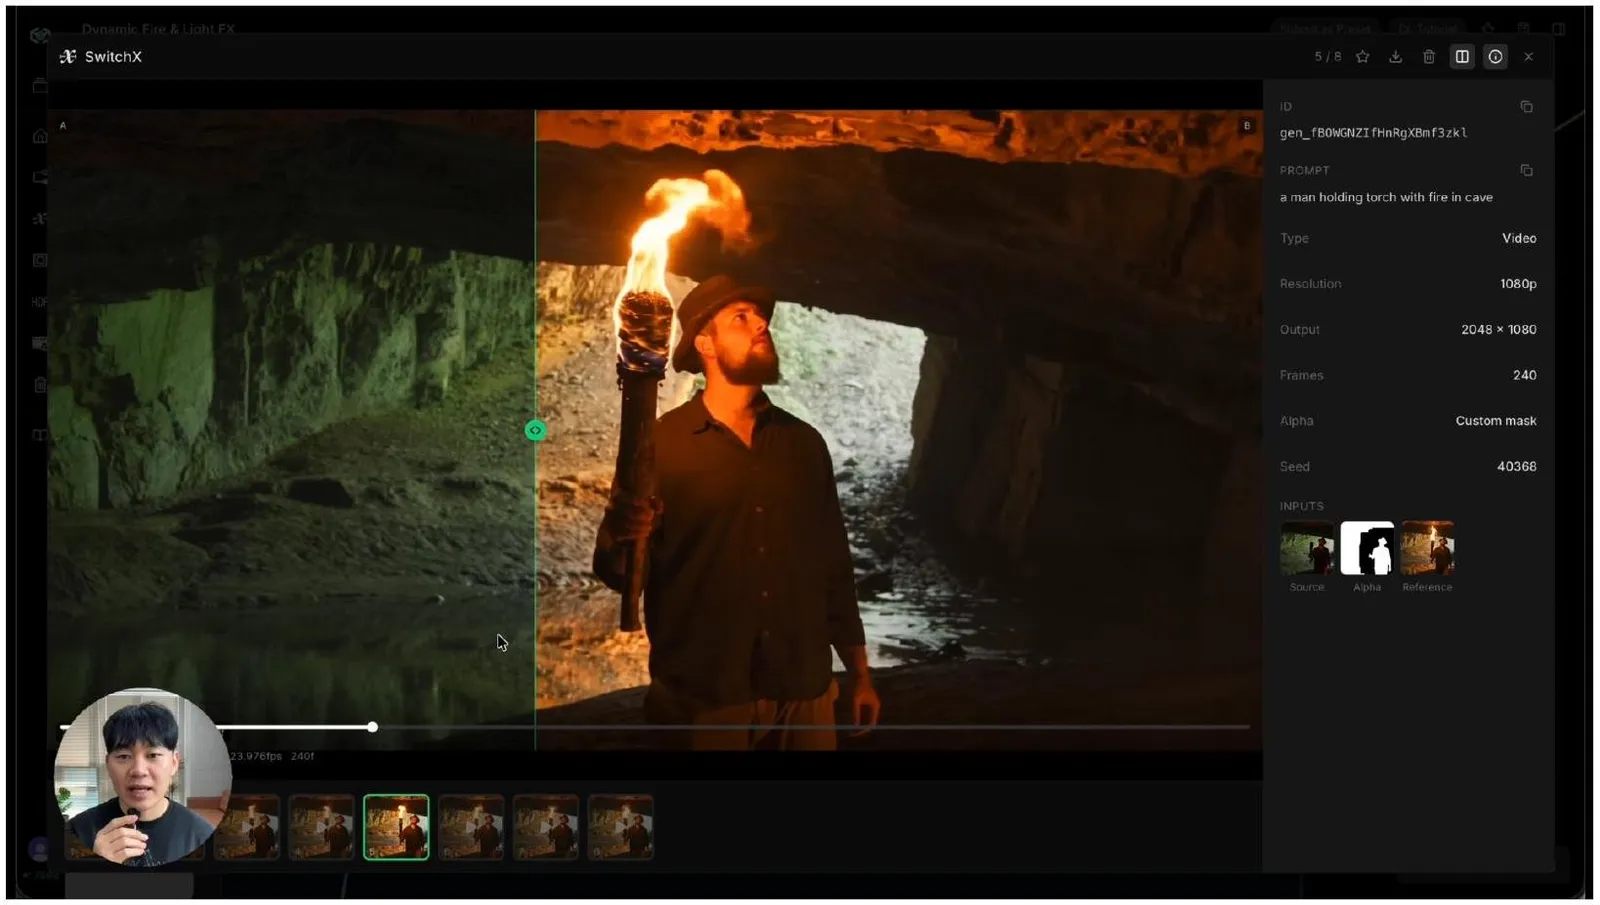
Step 4: Generating fire with SwitchX
Once the source footage, reference image, and mask are connected, the project is ready for SwitchX. This is where the transformation happens.
SwitchX introduces the fire effect while maintaining the visual information protected by the mask. More importantly, it relights the surrounding scene to account for the new flame source.
The actor's face receives warm highlights. The cave environment reacts to the firelight. Clothing and surrounding surfaces gain realistic illumination.
Instead of looking like an overlay, the fire becomes part of the scene. The same workflow can then be applied across additional camera angles, making it practical for multi-shot sequences.
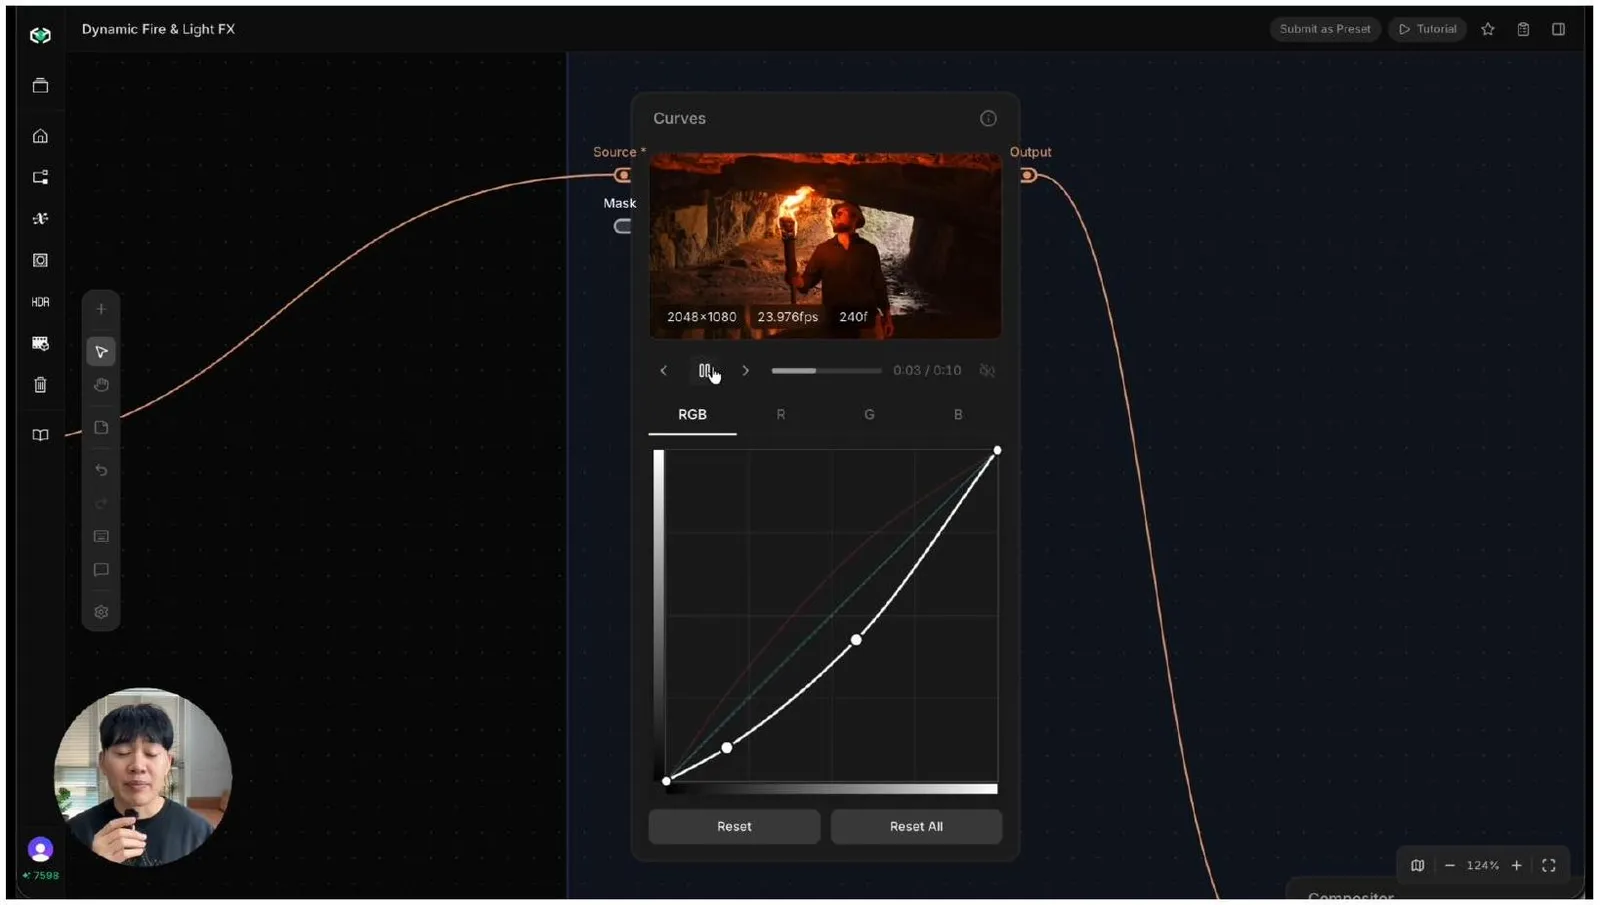
Step 5: Matching the final grade
The final stage focuses on color consistency. Because the tutorial includes both a close-up and a wider shot, the grade is adjusted to ensure the fire feels consistent between angles. Small adjustments to warmth, red tones, and overall darkness help unify the sequence and strengthen the illusion that both shots belong to the same scene.
All assets and the Canvas project template used in this tutorial are available to try right now on Beeble.
Practice footage provided by ActionVFX.
Credits usage breakdown
Shot 1
- LLM = 1 Credit
- Image Generator = 20 Credits
- Video Matte = 8 Credits
- SwitchX = 80 Credits
Shot 2
- LLM = 1 Credit
- Image Generator = 20 Credits
- Video Matte = 7 Credits
- SwitchX = 70 Credits
Total
- 207 Credits = $6.9